PCjs Machines
Home of the original IBM PC emulator for browsers.

Ohio Scientific Challenger 1P
C1Pjs is a JavaScript simulation of the Ohio Scientific Challenger 1P, an 8-bit 6502-based microcomputer manufactured in 1978. The base configuration included an 8Kb BASIC-in-ROM from Microsoft and 4Kb of RAM (user-expandable to 8Kb). Below is a simulation of the 8Kb RAM configuration.
Original Documentation is available, along with other machine configurations, such as C1P with Debugger and C1P “Array”.
C1P Documentation
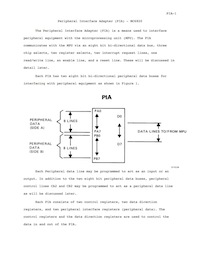
C1P Datasheets
Using C1Pjs
NOTE: For those of you who never used a real Challenger 1P machine, if any of the operational details of the machine seem bizarre, that’s not the simulator’s fault. It’s how the machine actually operated.
Some of those details are artifacts of teletype-based interfaces, which were more common than a video monitor interface in the 1970’s. On a teletype, there was no way to physically erase printed characters, so you had to count underscores to know how many characters had been erased internally.
Also, the wide margins on either side of the screen were a side-effect of how the machine displayed video on a conventional television set; they helped ensure that no characters would be displayed off-screen and therefore unreadable. As a result, even though the machine contained enough video memory for 32 rows of characters, each with 32 columns, the usable portion was much smaller.
The original C1P, with its more modern keyboard and video monitor interface, obviously could have done a better job processing and displaying user input (and in fact, I wrote some machine-language extensions back in the day that did exactly that). And Ohio Scientific did improve later models, but the original C1P functioned exactly as shown, with all its teletype-like idiosyncrasies and television-related limitations.
Starting the Simulator
- Press the RUN or BREAK button to start the C1Pjs Simulator.
- Press C to select a COLD START.
- At the MEMORY SIZE prompt, press Return to use all available memory.
- At the TERMINAL WIDTH prompt, press Return to select the default screen width.
Wait for the BASIC “OK” prompt before using the Load File button; this will allow the Simulator to automatically “LOAD” and “RUN” the selected program.
NOTE: The wide margins on the left and right sides of the screen are normal. The Challenger 1P’s display was organized as 32 rows x 32 columns of text, but its video circuitry lacked a “guard band” feature, which meant that only about 24 characters per line, and 24 total lines, in the center of the screen could be seen on a typical television monitor. As a result, the ROMs avoided drawing outside a 24x24 area. In the window above, the top 4 and bottom 4 rows are automatically cropped, but the left and right sides are not, because I eventually want to patch the ROMs to enable 32 characters per row.
Typing in the Simulator
The C1P normally uses only upper-case characters and expects its SHIFT-LOCK key to be locked, so the Simulator initially locks it, independent of your CAPS-LOCK key.
The C1P keyboard lacks characters found on modern keyboards such as ~ and _. Unsupported keys are simply ignored.
Characters can be erased using the DELETE key instead of the documented SHIFT-O. For each character that’s erased internally, an underscore is displayed.
Lines can be erased using the @ key instead of the documented SHIFT-P.
The BASIC power operator can be typed using the ^ key instead of the documented SHIFT-N; for example, typing “PRINT 5^2” should display “25”.
RUN and LIST commands can be aborted by pressing CTRL-C, unless the current program has disabled BASIC keyboard polling. Use the BASIC command “POKE 530,0” to re-enable BASIC keyboard polling, or press BREAK and then W for a WARM START.
Pressing CTRL-O disables input echo until it is pressed again; presumably this feature was added to prevent the display of passwords or other sensitive information.
If the Simulator is not responding to any keys, try clicking on the black display area to restore focus; if all else fails, press BREAK and then W for a WARM START.
Using The Emulator Controls
Press the Run button to start the Simulator; it will change to Halt while running.
Press the Reset button to halt and reset the simulated CPU; screen memory will be erased, but all other memory will be preserved, permitting a WARM START.
Press the Load File button to load the selected BASIC program into the simulated cassette device; the Simulator will attempt to automatically “LOAD” and “RUN” the selected program.
Alternatively, use the BASIC “LOAD” command to begin loading a program from the simulated cassette device. Press the spacebar at the end of the “LOAD” operation to restore keyboard control.
Press the Load Disk button to mount the selected disk image into the simulated floppy disk drive; press BREAK and then D to boot from the image and load the OS-65D operating system.
Controlling The Speed
The default speed of the simulated CPU is roughly 1Mhz, or one million simulated CPU cycles per second.
Press the FAST button to allow the Simulator to run as fast as possible; press SLOW to return to the default speed of 1Mhz.
Slow computers, as well as browsers with slow JavaScript interpreters, may not be able to achieve 1Mhz operation; in those situations, the speed controls will have no effect.
Implementation
This computer simulation was written in JavaScript, in part to test the performance limits of web-based applications. The result was one of the fastest JavaScript implementations of a 6502-based computer simulation on the web.
This application uses XML to define the machine architecture, XSLT to transform the XML into HTML, and JavaScript to implement the simulation and bind it to the various HTML elements. The C1Pjs screen is implemented using the HTML5 <canvas> element, so the application requires a browser that supports HTML5.
This application was tested with current versions of Safari, Firefox, Chrome and Internet Explorer. Somewhat less current versions will probably work as well, with the exception of Internet Explorer, which did not add support for the <canvas> tag until IE9.
C1Pjs is built from the following components, as listed in machines.json (see the c1p.modules property):
